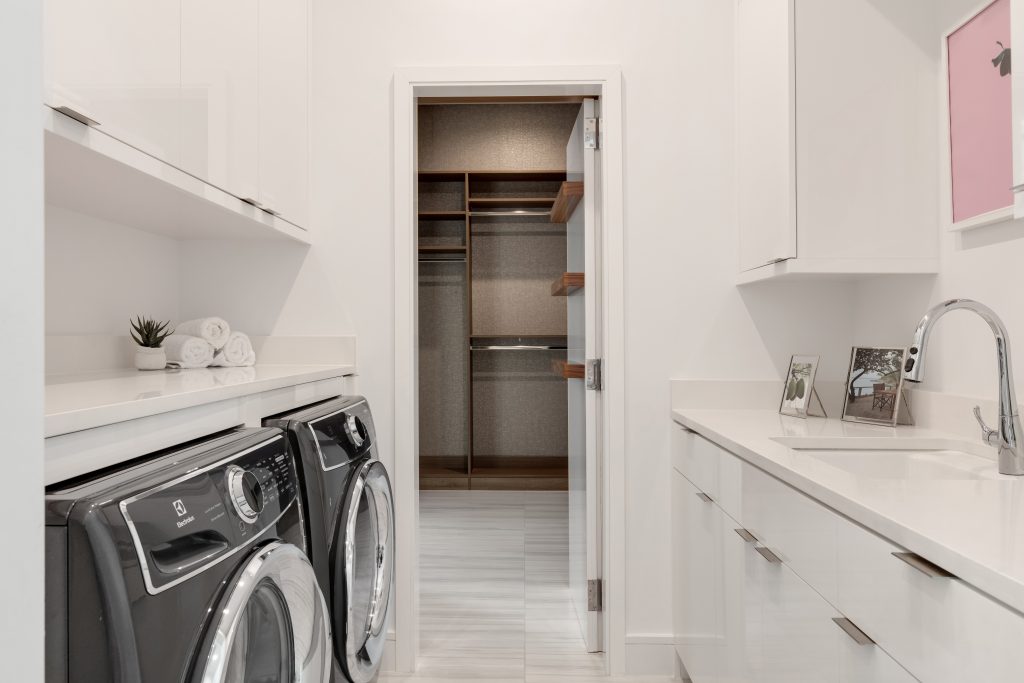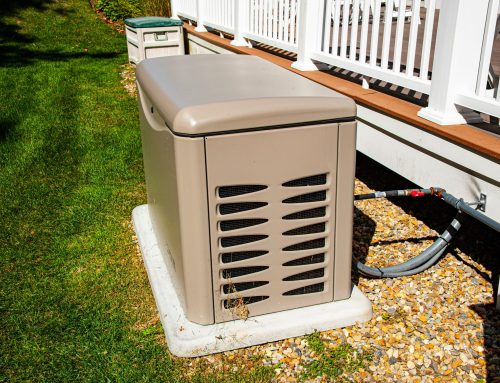
Start with utility room ideas that put function first
Utility room ideas to fit a water heater, softener, and RO without losing storage. See smart layouts, space-saving tips, and pro checklists. See how. Start now.
A well-planned utility room can handle your water heater, water softener, and reverse osmosis system while still leaving room for shelves, laundry, and seasonal gear. The secret is a layout that respects clearances, service access, and code, then layers in smart storage. Northern Mechanical helps homeowners and facility managers across Southeastern Wisconsin pull this off every week with practical, code-compliant designs that maximize every square foot.
Measure first, then design
Before you buy equipment or build shelves, take a complete set of measurements. Accurate dimensions make all the difference when you are trying to fit major equipment and storage into one compact space.
- Measure the room: length, width, and ceiling height.
- Note obstructions: doors, windows, stairs, sloped ceilings, columns, ductwork.
- Record existing utilities: floor drain location, sump, electrical panel, outlets, gas lines, vents, and water main.
- Capture clearances from equipment manuals. Every model has specific distances for safety and service.
- Sketch a simple plan with measurements. Use grid paper or a free room planner.
With a scaled sketch, you can test several utility room ideas quickly and avoid costly rework. Northern Mechanical can also survey your space and produce a layout that meets local plumbing and mechanical codes in Southeastern Wisconsin.
Smart layout patterns that save space
Certain patterns are proven to work in tight utility rooms. Choose the one that matches your room shape and door location.
Single-wall layout
Place the water heater, softener, and RO equipment in a straight line along one wall. This is ideal for narrow rooms or when a washer and dryer need the opposite wall. Leave service aisles of at least 30 inches in front of equipment.
- Mount a shallow wall rack above the line for filters and small parts.
- Use a sliding track or French cleat system for flexible storage.
- Place a floor-to-ceiling shelving unit at one end as a storage anchor.
L-shaped layout
Turn a corner to separate water treatment from hot water. Put the water heater on the short leg for safe venting, then the softener and RO along the long leg. This creates a natural service zone and a separate storage zone.
- Install corner shelving above the softener brine tank to reclaim dead space.
- Use a fold-down work surface on the open wall for maintenance tasks.
Galley layout
When you have two parallel walls, put equipment on one side and storage on the other. Keep at least 36 inches of clearance between walls for safe passage and service.
- Choose shallow 12-inch-deep shelves so they do not collide with equipment access doors.
- Keep the floor clear with wall-hung cabinets and ceiling racks for seasonal items.
U-shaped layout
If the room is wider, a U-shape lets you place the water heater on the back wall with softener and RO on the sides. This design gives dedicated service access for each unit and keeps a central aisle open.
- Add rolling storage carts under any open counter space for tools and detergents.
- Use labeled bins and clear containers so items are easy to find.
Stack and tuck layout
For very small rooms, use vertical space. A wall-hung tankless water heater and a wall-mounted RO system leave floor area for a softener and storage cabinet.
- Install a tall cabinet with adjustable shelves next to the softener brine tank to hide supplies.
- Use ceiling-mounted tracks or racks for ladders and infrequent-use items.
Equipment placement essentials
Water heater best practices
Correct placement improves safety and service life.
- Keep at least 2 to 3 feet of front clearance where the access panel and controls sit.
- Place a drain pan under tank-style heaters with a drain line to a floor drain or condensate pump.
- Follow venting rules for power vent or direct vent models. Short, straight vent runs are best.
- Add an expansion tank on closed systems per code and mount it where it is easy to inspect.
- Set the water heater near the main water line to reduce pipe runs and heat loss.
Water softener positioning
Softener placement affects salt handling and bypass convenience.
- Keep the brine tank accessible so you can add salt without lifting heavy bags high.
- Install an easy-to-reach bypass valve and label it clearly.
- Provide a 1-inch drain line with an air gap where required by code.
- Allow room to remove the control head for service.
RO system placement
Most RO systems are point-of-use under a sink, but many homeowners want filtered water at a fridge or dedicated faucet.
- Under-sink RO: reserve a 24-inch-wide cabinet bay and plan for a small pressure tank.
- Remote RO: mount the RO unit on a wall panel in the utility room and run lines to the kitchen or bar.
- Add a sediment prefilter upstream of the RO to extend membrane life.
Space-saving upgrades that earn their keep
Some equipment choices give you more storage room instantly.
- Tankless water heater: frees floor space, reduces standby losses, and mounts to the wall.
- Shorter, wider tank replacement: a low-boy heater can fit under shelving in low-ceiling basements.
- Combination boiler-water heater units: in some homes, one appliance can handle heat and hot water.
- Compact softener: choose the right grain capacity for your water hardness and household size to avoid oversizing.
- Wall-mounted RO bracket: keeps the cabinet floor clear for bins.
Storage that works with plumbing gear
Plan storage around service zones. Never block access panels, valves, or disconnects. Use these utility room ideas to protect functionality and keep clutter off the floor.
- Zone storage: cleaning supplies near the sink, laundry items near the washer, and infrequent items up high.
- Adjustable shelving: change shelf heights to fit tall bottles, filters, or salt bags.
- Pull-out bins: slide-out bins under counters keep small parts organized.
- Pegboard wall: mount a pegboard above a work surface for tools and hoses.
- Over-door racks: use the back of the door for lightweight items like gloves or microfiber cloths.
- Label everything: clear labels reduce time spent hunting for parts.
Code, safety, and access clearances
Safety and code compliance come first. Here are baseline considerations. Always verify with local rules and manufacturer instructions.
- Combustion air: gas-fired appliances require proper fresh air or sealed combustion.
- Venting: maintain slope, length limits, and termination distances for exhaust.
- Electrical: GFCI where required, dedicated circuits for equipment, and clear working space in front of panels.
- Seismic strapping: in some regions, strap water heaters. In Wisconsin, follow local guidance and manufacturer requirements.
- Drainage: provide a floor drain or pump for condensate and pan drains.
- CO and smoke alarms: install near sleeping areas and in utility zones as required.
- Clearances: respect minimum distances around each appliance for fire safety and service access.
Plumbing and piping strategies that save space
Thoughtful pipe routing keeps your room neat and serviceable.
- Manifold approach: use a PEX manifold to centralize shutoffs and reduce pipe clutter.
- Wall panel: mount a plywood backer panel and organize valves, filters, and controls in one vertical plane.
- Service loops: leave gentle loops for flexible connections so components can be removed without cutting pipes.
- Color coding: red and blue PEX lines improve clarity during service.
- Condensation control: insulate cold lines to prevent drips and protect storage below.
Venting and combustion air in tight spaces
Short, direct vent runs save space and reduce noise. If using a power vent water heater, plan the vent path before placing shelves. For sealed combustion appliances, intake and exhaust can often share a wall penetration with proper spacing. In small rooms, louvered doors or ducted combustion air may be required.
Water quality design for softener and RO
Great water quality starts with correct sizing and staged filtration.
- Test water hardness, iron, and TDS before selecting equipment.
- Size the softener by household size and peak flow rate, not just total grains.
- Add a sediment prefilter before the softener if you have sand or silt.
- Use a carbon filter before RO to protect the membrane from chlorine.
- Consider UV disinfection in rural wells where bacteria are a risk.
- Provide a bypass around both softener and RO for service and emergencies.
Noise, vibration, and comfort
Quiet equipment makes the utility room pleasant and reduces disruption in living areas.
- Use anti-vibration pads under tank-style heaters and brine tanks.
- Isolate copper lines from studs with cushioned clamps.
- Choose quiet exhaust fans sized for the room to manage humidity.
- Add a sound-absorbing panel or acoustic ceiling tiles if walls transmit noise.
Flood protection and drainage
Water and storage do not mix. Give any leaks a safe path.
- Install a floor drain or a low-profile drain channel where possible.
- Add leak detectors under the water heater, softener, and RO tank.
- Use an automatic shutoff valve tied to leak sensors.
- Route all discharge lines to an approved drain with an air gap as required.
- Keep stored items off the floor on plastic risers or metal shelves.
Electrical and controls in a combined utility room
Plan the electrical early so outlets and controls are in the right place.
- Provide GFCI protection near sinks and floor drains.
- Dedicate circuits to large loads like a power vent water heater.
- Mount control valves and bypasses at shoulder height for easy reach.
- Label every valve and switch. Use durable tags.
- Add a battery-backed smart leak system for alerts when you are away.
Step-by-step planning checklist
- Test your water and note hardness, iron, and TDS.
- List homeowners’ goals: storage needs, laundry, workshop tasks, and future upgrades.
- Measure the room and sketch utilities and clearances.
- Select a layout pattern: single-wall, L-shape, galley, U-shape, or stack and tuck.
- Choose space-saving equipment where it makes sense.
- Design storage zones and pick shelving types that fit around service areas.
- Plan plumbing manifolds, drains, and vent routes on your sketch.
- Confirm code requirements and manufacturer clearances.
- Order parts and schedule installation.
- Label valves, install leak sensors, and set a maintenance calendar.
Common mistakes to avoid
- Blocking service access with shelves or laundry machines.
- Skipping drain pans and leak sensors under water heaters.
- Oversizing the softener so it wastes salt and space.
- Undersizing RO storage tanks, causing slow water delivery.
- Running long, twisting vent pipes that cause noise and compliance issues.
- Forgetting a bypass around the softener and RO.
- Ignoring combustion air needs in a sealed utility room.
- Using deep shelves that crowd the aisle and make servicing dangerous.
Cost ranges and timelines in Southeastern Wisconsin
Every utility room is different, but typical ranges help with planning. In our region, homeowners commonly invest in upgrades that improve function and save space.
- Tankless water heater installed: budget for equipment and venting changes.
- Standard tank replacement with pan, drain, and expansion tank: often lower cost and quick.
- Water softener with prefilter and bypass: varies by grain capacity and plumbing complexity.
- RO system with remote lines to the kitchen: add cost for line routing and finish work.
- Storage buildout: shelving, wall panels, lighting, and leak sensors scale to your space.
Northern Mechanical provides clear estimates, options, and timelines up front. Many projects complete in one to two days depending on scope. Larger reconfigurations with venting changes or manifold work may take longer. Our 24/7 emergency services are available if you have a leak, no hot water, or a failed softener while you plan a full upgrade.
When to call Northern Mechanical
If your current setup is crowded, hard to service, or shows signs of leaks, it is time to design a better layout. Northern Mechanical, LLC serves residential, commercial, and industrial clients across Southeastern Wisconsin with certified professionals who deliver code-compliant, space-smart solutions. We can evaluate your room, recommend the right equipment, and organize plumbing, venting, and storage so everything fits and works safely. Our team is known for reliability, affordability, and fast response, including 24/7 emergency support.
Maintenance checklist to protect your layout and storage
- Inspect leak sensors monthly and replace batteries as needed.
- Check the water heater drain pan and drain line for obstruction.
- Test softener bypass and clean the brine tank annually. Refill salt when low.
- Replace prefilters on schedule to protect the softener and RO membrane.
- Sanitize RO tank and lines per manufacturer instructions yearly.
- Inspect vent piping for secure joints and proper slope.
- Verify expansion tank pressure matches system requirements.
- Clean shelves and keep the floor free of clutter for safe service access.
Pro tips that make small rooms feel big
- Go vertical: wall-hung equipment, pegboards, and tall shelves maximize space.
- Keep aisles clear: 30 to 36 inches of open space feels safer and looks cleaner.
- Use light colors and bright LED lighting to make the room feel larger.
- Put heaviest items low and close to the door to reduce lifting.
- Standardize bins and labels so everything has a home.
Frequently asked questions
Can I stack RO and softener equipment?
You can mount the RO on a wall panel above the softener, but do not block access to the softener control head or brine tank. Keep a safe drip path with a drain nearby.
Is a tankless water heater always the best space saver?
Tankless units save floor space and can be excellent in tight rooms. However, they need proper gas supply, venting, and sometimes recirculation lines. A compact tank may be simpler and more cost effective in some homes.
How much clearance do I need around my water heater?
Clearance varies by model. A common target is at least 24 to 36 inches at the front for service, with side and rear clearances per the manual. Always follow the manufacturer and local code.
Where should I put the softener brine tank?
Place it where you can pour salt easily and where a small spill cannot harm stored items. Keep it near a drain and away from electrical panels. Leave space to clean or replace the tank.
Do I need a floor drain?
A floor drain or condensate pump is highly recommended. It protects storage and finishes if a leak occurs and is often required for pan drains and condensate.
Can Northern Mechanical help with both equipment and storage?
Yes. We design the mechanical layout and coordinate with storage solutions so shelves, cabinets, and equipment live together without conflicts. Our certified team ensures every valve and filter is accessible and labeled.
Put these utility room ideas to work
With the right plan, you do not have to choose between clean water and useful storage. Measure carefully, pick a layout that fits your room, and use space-saving gear where it makes sense. Add organized storage that respects service zones and code, and protect the room with drains and leak sensors. If you want a professional plan and a clean, safe install, Northern Mechanical is ready to help. Our experienced technicians deliver reliable, affordable plumbing and piping solutions for homes and businesses across Southeastern Wisconsin, backed by 24/7 emergency service. Reach out to schedule a consultation and see how these utility room ideas can transform your space.


